Recently I decided to mess around with the Facebook iOS SDK. I’m not really sure what I want to do with it yet, but when I started running thru the instructions and hopping back and forth between their various samples I started getting confused. Some of the tutorials are a bit out of step with each other – perfect opportunity for a blog page.
What do I want to achieve?
I’m not really sure at this point, but I was thinking about a hybrid app that could combine my blog feed with my social feed from facebook. Some concept like this to interweave things. Just an idea…I’ll be developing all this on my Macbook Pro with latest iOS 6 based tools. If this comes out nice I’ll also build an Android version.
Learning the Facebook SDK for iOS
Fro the most part the development tools and docs are pretty good, although they assume you know your way around XCode – which for the most part (on a good day) I do. Here’s the relevant pages to go to:
- developer.facebook.com: main developer page where you create appIds and can get access to all the docs for the various SDKs.
- developers.facebook.com/docs/getting-started/facebook-sdk-for-ios/ : definitely the starting place and all the other tutorials assume you have memorized this one. Basically you need to ignore alot of the initial setup in the other tutorials and follow this one, for example the Scrumptious tutorial does not cover where to add a Facebook appId or even that this needs to be done.
- developers.facebook.com/docs/tutorials/ios-sdk-tutorial/ : Main tutorial that covers most things. Its really a pretty good tutorial.
Using the Facebook iOS SDK in XCode
Seems trivial – but the directions could be a bit clearer for how to set things up. First act is to download the sdk and extract is somewhere on your machine. Following the direction, add the framework (FacebookSDK.framework) to your Xcode project by literally dragging and dropping the folder on the frameworks folder in your project.
The next step is to create an appId and add this to the property keys in your project’s .plist file. When creating your app on the Facebook site you don’t really need to have final values for the strings like appName and stuff. appID has to be legit tho.
With that done its onto the main tutorial – Scrumptious. Things are pretty clear up and thru step 1 and 2a,b. In step 2c the tutorial tell you to start wiring up things in the interface builder, but I find it easier to first add the actions and properties. So first add:
- (IBAction) performLogin:(id)sender;
@property (strong, nonatomic) IBOutlet UIActivityIndicatorView *spinner;
to the implementation file and then you’ll see the connections in the builder to complete the wiring. Step 2c also has you add a function called openSession to the app delegate. This function includes the mysterious “^” operator – what’s that? Its a block declaration operator.
In Step 2d it sure would be nice to get a deeper explanation of what is going on. Basically Facebook SDK uses OATUH for managing sessions. What that means is that we’ll need to deal with a workflow between  the mobile app and a mobile browser/local Facebook app where the actual login event will be handled. IMHO – this is an ugly experience – but its fairly common for OAUTH. Seems to work ok, just I think it makes for a loopy strange login experience. Step 2d also includes a tricky piece that is simple to miss:
    self.navigationItem.rightBarButtonItem =
                              [[UIBarButtonItem alloc]
                              initWithTitle:@"Logout"
                              style:UIBarButtonItemStyleBordered
                              target:self
                              action:@selector(logoutButtonWasPressed:)];
Check carefully the trailing “:” on the action event that essentially tells the runtime to pass id the ID of the sender. If you miss that you’ll get the dreaded “can’t find the stinking selector…” error. With that done I’ve got login and logout working properly. The tutorial is pretty straightforward – its just the little things. Like why not use interface builder consistently or not…so the nav button work should have been done in IB I think.
Working with the FB Request Object
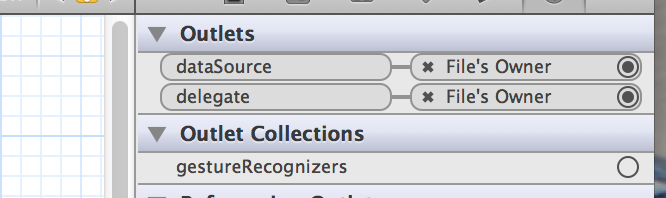
With login’s in hand – now what? Well let’s start with the basics – and keep trailing the tutorial I guess. Pictures and some basics for the account. Well starting with adding the picture you get yet again some vague instructions to “wire up” stuff. Ok – here’s the deal: add the two properties to SCViewController for the picture and image. Then go into IB. Add a UIView and set the properties as described and add the label  too. You’ll be able to wire the label to the string property – no problem. To add the outlet property to the image you first have to adjust the class of the view – set it to FBPictureProfileView and then you can make the connection through the File’s Owner.
Personally – always felt that the setting of properties and linking outlets has always been kinda goofy. I guess it works…anyway…time to populate some data. Speaking of works – had a bit of trouble at the FBPictureProfileView step. No matter what I did I could not get XCode to recognize that class. After 15-20 minutes and many curses I decided that cleaning the crap out of the project, fiddling with the code, restarting XCode, and various magical phrases were not going to work. This brings up an important lesson:
When in doubt reset the stupid monkey assed simulator.
Viola! What a PITA!
To get the picture working – don’t forget to turn off the autolayout stuff and then set the margin/resize arrows like this:
With that out of the way I’m ready for step #3…but I’ll post that in a day or so. Oh – the instruction to include the viewDidUpload method that includes the removeObserver is deprecated in iOS 6. What I would suggest is to include this in a dealloc function like this:
-(void) dealloc
{
    [[NSNotificationCenter defaultCenter] removeObserver:self];
}
Facebook SDK for iOS Verdict
Hey its pretty cool and works for the most part! The tutorials are actually helpful and reasonably up to date. I’ll complete the rest of the steps and post an update in a few days – hey you can see my update here:
Working with FaceBook iOS SDK Pt. 2