Linux Development on macOS with Parallels
Recently I needed to do some linux development on macOS with Parallels so that I could debug some issues in a C++ project. macOS C++ is still a bit wonky for working with a C++ project written with standard libraries, so I decided to setup an Ubuntu virtual machine using Parallels. I learned quite a bit about this, but was successful.
Environment and Machine
I’ll be doing this on my standard MBP (15-inch 2017 with a 2.9 GHz i7, 16GB of RAM, and the Radeon Pro 500 graphics chip). At the time of writing I’ve got macOS 10.14.2 (Mojave) and I’ve purchased the Parallels Desktop Pro Edition and I’m using V 14.1.0 of that product.
Why Parallels and not VirtualBox? I use VB quite a bit, but performance is a problem. Screen refresh rates and the delay in interacting make it difficult to use with a GUI desktop where you want snappy screen refreshes. So for this use case I will be spending some bucks.
The Job to be Done
Basically I need a linux distro configured with tools for compiling C/C++ code, running SonarQube analysis, debugging issues, and editing sources. unfortunately there are still lingering differences in Apple’s C/C++ libraries and header files. It would be good to have an IDE, but please not Eclipse 🙂
Configuring Ubuntu 16.04 for Development
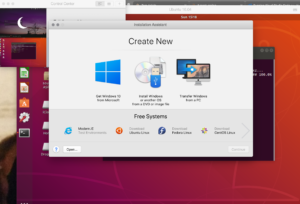
Getting Parallels installed is too simple to even discuss. Once it is there it is a simple matter of picking off a distro and going thru the GUI installer steps. I’ve been using Ubuntu for things lately so I’m just going to go with that.
I did have one issue with Parallels. Getting getting the basic Ubuntu installed I applied a bunch of updates. After that it complained that there were missing kernel files and the Parallels Tools were not loading up. Basically the fix was to locate the .ISO image for this (look in Applications/Parallels/Contents/Resources/Tools) mount the image (prl-tools-lin.iso) manually and then run the installer. Restart the VM and you should be good to go.
In addition to this I also bumped up the RAM allocation from 1GB to 2GB to give me a little performance bump. I did the same with the graphics memory allocation – double the default.
Adding Tools to Ubuntu 16.04
Its times like these that you really start to appreciate Homebrew, but things are much improved with apt-get on Ubuntu compared to the early days of Linux. It is definitely important on Ubuntu to get as familiar with apt-get – it’s your friend 🙂
Starting with the very basics – I will want to get a bunch of development tools installed. Before starting be sure to have all the latest packages by running this command:
apt-get update
The first tool to install is CURL, which you will need at some point for sure:
sudo apt install curl
Configuring Java and JAVA_HOME
GCC is already installed. Java is installed, but I opted to install a new version with apt-get: sudo apt install default-jre. JAVA_HOME is not set by default and many tools require this. . You can find your Java home with this command:
update-alternatives --config java
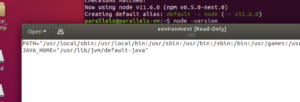
Then I think the best place to add this is to the /etc/environment file. You can use this command to edit the file:
sudo gedit /etc/environment
Note that I’ve installed a JRE and not a JDK, which you may need (or I may need later at some point). With that set close and re-open a terminal and echo $JAVA_HOME should work and of course “java –version” should return the right JRE.
With that done, installing SonarQube’s C/C++ scanner is pretty straight forward and follows their documentation. I won’t go into details (check the link), but I did put their SonarQube configuration into the ~/.profile file and not the ~/.bash_profile file as I do on macOS. By default on Ubuntu the .profile file is where you can add environment vars. You could also add a .bash_profile…
Installing Node Version Manager and Node.JS
Node is quickly becoming a must have package even if you are not using Node.JS itself. There are some great resources out there for doing this so I will not repeat them. I do think that you should resist the easy “apt-get install nodejs” and instead install Node Version Manager and then have NVM manage your Node installations. This gives you much more flexibility.
What to do about an IDE…
So I currently need to work on C/C++ code. IntelliJ Community Edition is available, but not exactly great with C/C++. I’ve been using Mircosoft’s VS Code on macOS and wow how the times are changing! There’s even a GUI installer for this on Ubuntu – just search in the software center and fire away! Amazing!
Installation went fine, but starting up the IDE showed some obvious issues. It took quite a while (45 seconds), but it finally appeared. I did a check for updates and got an error message: ENOENT: no such file of directrory.lstat ‘/snap/code’. Have to figure that out…
Well I did successfully load up some code and it seems to work for now. The version reported is 1.30.00, which sounds right – I have version 1.30.1 on my MBP.
I did increase the available number of file handles from 8192 to 262144 to get rid of warnings about “large workspaces” and not enough file handles. You can see what your current file handle count is with this command:
cat /proc/sys/fs/inotify/max_user_watches
To up this value you will need to modify /etc/sysctl.conf by adding this line:
fs.inotify.max_user_watches=262144Ubuntu in Parallels on macOS – Pretty Nice!
So far so good with this configuration. I will continue to add to this article as I can already see there are some missing libraries and headers in the basic C/C++ setup. Overall I’m quite happy with the Parallels performance compared to VirtualBox. Much faster and more stable – no doubt about it.
This is also my first post with the new Gutenberg WordPress editor. Pretty decent improvement, but there’s a learning curve for sure.


