Get WordPress 5.2.x Working on Mac OS
Ok – so you got a new MacBook Pro and you need to get WordPress 5.2.x working on Mac OS. There are a surprising number of things do in order to get it right. You’ll need a number of products and getting things installed correctly from Day 1 will really make upgrades easier to recover from as well as keep your machine more secure. Here’s our guide to getting Apache PHP, MySQL, and finally WordPress installed with the basic plugins so you can develop locally.
Prerequisites to Get WordPress 5.2.x Working
In my previous post I talked about how to setup a MacBook Pro for development. I definitely think you should follow all of those tips, including the use of Homebrew to get your Apache httpd and PHP environment setup properly. The main benefit to this setup is ease of upgrading both the underlying Mac OS and all the tools. You can stick with the pre-installed Apache httpd, but keep in mind that it will be “messed with” by Apple during Mac OS upgrades.
I’ll be doing this install with the very latest PHP – 7.3.6 at the time of writing.
WordPress Installation 5.2.x Basics
Its pretty simple to get WordPress 5.2.x installed, although it can be easy to forget things. The first thing to do is  get a database setup. I’ll be using MySQL because its easy. I’ve got the Workbench GUI installed (because its easy) so all I need to do is create. database and a user with full access to it. I’ve given the user access plus admin privs to the database. The main challenge is getting the user setup right. Create the schema, then create a user, restrict its access to localhost, and then give it full rights to the schema.
Be sure to test the connection now from the Workbench.
Once that is done, download the WordPress distribution. Extract the files and then move them into. folder under your webroot (www in my case).
Setup Apache httpd Permissions for WordPress 5.2.x
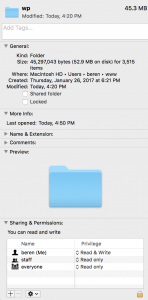
 On my local machine I’ll just go with the basics to start and access it via localhost/wp. I’ve put the WordPress files under the www (in my home directory) in the “wp” directory. Check the file permissions. You will need to either modify the permissions or update your httpd.conf (with a homebrew installation this is in /usr/local/etc/httpd) file to match the User and Group values for your folder. I’m doing the latter, but please keep in mind this is my local laptop and don’t do this kind of thing in production. I also run my server on a crazy port number and I do not keep it running unless I’m actually doing development work.
To get redirects working for REST API calls you will also need to adjust httpd.conf values in the <directory /> section:
- AllowOverride All
- Require all granted
- Options Indexes FollowSymLinks Multiviews
- MultiviewsMatch Any
With all that done – restart your Apache httpd (apachectl restart) and you should be able to pull up the default installer with http://localhost/wp/index.php.
Load up the WordPress 5.2.x Installer
As I said above load up the installed by hitting your wp/ directory from a web browser. From here out you are in the basic WordPress installation routine. I always setup an admin user with a hard to guess ID and PWD even locally. When the installer is complete, go to the site and log in. Check out the admin console and make sure everything is working as expected. Next up is to get Jetpack installed.Before you install the plugin you need to add the following line to the wp-config.php file:
define ('JETPACK_DEV_DEBUG', true);
and to get plugin installs working add this:
define('FS_METHOD', 'direct');
This tells the plugin that you are offline. This will make some of the modules not work, but at least you can load up most of the plugin for testing purposes.
Typically Jetpack wants to install using an FTP server, but for local purposes you can grab the Jetpack plugin’s files from here and then drop then in your wp-content/plugins directory and then install it.
Finishing Up with WordPress 5.2.x Installation
All pretty straightforward really, but a few things that can be difficult to remember. With all the above done you should have a running site with the default theme:


