Back from Vacation – Creating a Photo Video
So I’m fresh back from a weeks vacation and wondering how to easily create a cool slide show from all my photos. Creating a photo video would be very nice for family. You would think there’s a simple solution for this, right? Maybe – let’s see. I have about 350 pictures from my Canon SD950IS, my B-Berry Bold 9000, and some from a couple of other sources like an iPhone camera. I want to assemble these into a slide show with a soundtrack. So a video with each pic displayed for 5 seconds will last about 25 minutes. I’m doing this on my T61P ThinkPad so I expect some processing “challenges”.
Creating a Photo Video – What about a soundtrack?
I have the pics I need , but what about music? This is an easy choice to me – Audacity is the best program out there for freeware sound editing. I grabbed this and installed it. I did make a dumb mistake – at the Disney parks you can buy CD’s of music. You cannot easily buy these on the internet. I would gladly buy songs from iTunes or anywhere else on line. I was looking for the music from Soarin’ and the Epcot Illuminations show, but I could not find a place to buy them. If you go thru YouTube you can find posts with the music and use a stripper like ListenToYouTube to rip out the audio to an mp3 file. I’m not advocating this approach – please Disney you should give people an option to buy! This approach works pretty good and I have enough music for my show now at a decent quality level and stereo.
Creating a Photo Video – Can Picasa 3.8 do it?
Straight off – I use Picasa for my photo management. Its free, pretty simple and supports an easy way to share photos online with my friends and relatives. I don’t have a ton of fancy needs really so Picasa has always been ok for me. The main downside to Picasa is that it does not work too great with Facebook, but nothing is perfect I guess. Naturally I turned first to Picasa 3 to see if it could handle the task of making a simple movie/slide show.
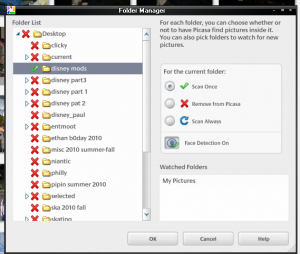
Making a simple movie is…er well…dirt simple in Picasa. Install Picasa on your machine. Following the install process, Picasa will ask about scanning your computer, for me I do not want it to scan my entire machine since I’m building this video on my laptop, not my main picture machine. There’s no way to turn off the scanning crap, so off it goes. It will take a while so go get a couple of beers (pick one from  my list!). Once the scanning is done I removed all the found pictures by right clicking on all the folders and selecting “remove from Picasa”; make sure you do not pick off “remove from computer” or it will really delete the pics!!
I placed all the pics from my devices into a single folder and then in Picasa picked from the main menu, File, and then Add Folder to Picasa. I added the picture folder to Picasa and told it to scan it constantly. Picasa will pick up the folder and add all the pictures for you. It will take a while to do this.
Once it is completed simply right click on the folder in the left panel and pick off Select All, then in the toolbar at the bottom click the Movie icon. The movie tools will open up and yo ucan move the pics around, edit the titles, change the animation style, and add your soundtrack file. Once you get all that crap done hit the “create movie” button.
 Then go take a nap…it takes a long time to render a movie of this size in Picasa. Nearly 45 minutes on my machine. Picasa will create a WMV file in My Documents//My Pictures//PicasaMovies. Watch out – this file will be huge – my video is nearly 3 GB in size.
Creating a Photo Video – Microsoft Photo Story 3
The other choice out there is from Microsoft (yeah if you read my stuff you’ll notice I’m not a huge fan of MS)- I’ve never heard of Photo Story until I started reading the Google forums on Picasa where people were saying this was really a better tool for making videos. It is free so that’s good. You’ll need to have MS Media Player 10 or better to use it (I didn’t I only had 9 since I normally use VLC). Both are quick grabs from Microsoft’s site. Bummer with WMP is that the install requires a reboot. Argh!
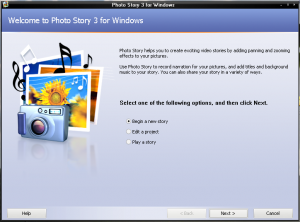
So after a reboot I can install the software and take a peek. On start up you are presented with a wizard to create a new project. The next  screen allows you to import pictures from a folder. I’m not sure where it is importing them to – hopefully it si not copying them somewhere, but it takes a while to finish.
After the import is complete I got an error. I have too many pictures. The most you can have is 300 and I have 350. I have to pair down my set of pics – ok that’s not too good, but ok. I removed some pics. While doing that I noticed that unlike Picasa Photo Story cannot sort the pictures by the time stamp on the picture from the camera so my pictures are all out of order and stuff. Ugh. Well I tried to fix them, but that’s going to be a real pain so let’s move on. the next step is to select a soundtrack – no problem with the MP3 file I have, then I can select an animation style. Well I kept the default since it looked like a pan  and scan. The rest are cheesy ppt style crap. Once that is complete then you can begin the render process, but hold on a second!
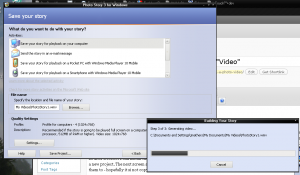
The rendering options for PhotoStory are very limited. The maximum resolution is 1024×768 – oh boy that’s terrible! Picasa supported a full HD resolution! Oh well – ket’s go with 1024×768 and try it. So again – go get some more coffee. Photo Story will also drop out a file in your movies folder. The render process was considerably faster than Picasa, but of course this is due to the resolution difference. Likewise the movie is also much smaller in size at only 130 MB. Watching the video shows that is is created with a decent pan and scan effect and the audio track sounds ok too, but it does suffer from over cropping of the image, lack of widescreen, and the resolution is not nearly as nice as the version produced by Picasa.
Creating a Photo Video – Picasa vs. Photo Story
In the end here’s how I see it. Picasa is the technically superior product. Either tool will make a simple video easily for you. Both are free. Both worked and produced a decent video. Picasa is great if you already use it for general web albums. Picasa supports much higher video resolutions. Picasa properly sorts your pictures based on the timestamps in the pictures. Picasa does not limit you to 300 pictures. So in my view Picasa wins hands down.
Technical Details:
- PC: Lenovo ThinkPad T61P with dual core 1.03 GHz Intel processor and 2 GB RAM
- OS: Windows XP Pro SP3
- Google Picasa V 3.8
- Microsoft Photo Story 3


Already had a couple of emails – “well what then? ” – in other words how do I make this thing usable on a DVD. The answer is to get either SoThink DVD Maker or Any Video Converter. Both programs can take your WMV file and burn it to DVD in NTSC or PAL format. The resolution will get dropped quite a bit. You shoudl see if your DVD/Blue Ray Player player supports WMV or AVI formats and then maybe you could play those directly.
I guess I’ll be posting an updated story here. It turns out that Picasa does a decent job until you listen to the video with a decent sound setup. Poor sound quality because really annoying – can’t listen to it. I search on the Google forums and it seems this is a known limitation. Here’s a case where I think spending some $$$ is a good idea – Nero 10 here I come. I’ll post an update – probably a new post on Nero Multimedia Super-Ultimate-Platinum-User Suite.