Appgyver, Steroids, and Composer – Cross-Platform Mobile Dev
Cross-platform mobile dev tools are evolving rapidly. I’ve been working with Titanium quite a bit lately. Its ok for getting apps to work, but no doubt the learning curve is pretty steep. There are just enough quirks in the JS, CSS (I mean TSS), etc. to kinda be a pain. I played a little bit with AppGyver last year and thought it had potential. Now that Titanium and Appcelerator are going thru a bit of a burp with the new platform, taking a look at AppGyver and its tooling makes a lot of sense.
Getting Started
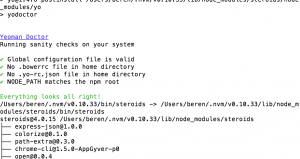
Certainly if you are reading this then you can read the AppGyver getting started materials yourself :-). I would recommend that you get at least node.js installed using brew on your own (yes I’m on doing all of this on my 15″ MBP with OS-X 10.10.3). I had to do a little re-fresh and a few things have changed since last year. Composer is now available, but I think starting with the CLI tools is better because you get a better sense of what is really go ing on with the framework. I happen to have a bunch of stuff installed, but the installer ran with no issues. It does a nice job of checking your machine to make sure things will go well.
The First Mile Tutorial is pretty decent. the scanner concept is really nice in terms of making it super easy to get an app onto your device. What is especially cool is that the app will be re-deployed to the device when you change files in the project – although you can turn this off if you like. You can also set 
Going the 3rd Mile
Cross-platform mobile dev tools are all starting to bundle in various forms of MBaaS tooling to draw developer attention and Appgyver is no exception. The 3rd Mile tutorial introduces the cloud platform that Appgyver has. This tutorial introduces data services. You can create little databases or add your own data providers. Pretty simple to configure access to things like a REST/JSON data provider and then pull that data into your mobile app.
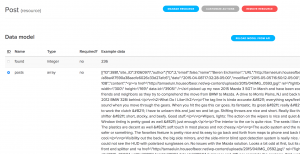
The data above is the RSS feed queried from this blog. Pretty simple to setup, just enable the feed in your Jetpack settings and then you can add it thru the data providers console in appgyver’s web console. The tools are fairly basic in comparison to more mature providers like kinvey.com and parse.com, but you can do some neat things pretty easily.
From the console you can then deploy your app to the cloud, run builds, target platforms, and manage your app’s distribution.
Composer – Um – did you Forget Something?
LOL – just as I was writing these guys released a new version. Stay tuned – I will update!
Cross-platform Mobile Dev Things To Remember
- “steroids connect” from a project folder starts the server, but if you close the browser screen with the QR code – type c in the running connect server console.
- To log out messages to the console use
steroids.logger.log("Your message here!") - If you get an error from the command line that port 4567 is in use already, you’ve probably terminated a command or screwed something up. You can re-boot or do this to kill the process: `sudo ps -A | grep ‘steroids’` to get its process number and then `sudo kill -s kill [process number]`
- I’m using PHPStorm as an IDE. Its handy to have CoffeeScript transpilation working. To get that setup, open a terminal from within PHPStorm (lower left corner), and then install coffee script globally with this command: npm install -g coffee-script. Then in PHPStorm open up one of the .coffe files in the config folder of your project and it will prompt you to setup a file watcher. This also works in WebStorm too.
- Don’t forget “steroids update” from a project directory to update all your dependencies.


