Ok – it was a PITA to deal with a few layout issues on my last project that obviously I’m ignorant about how to properly do this with layouts in Android. Time to focus and get it right. Since I’m doing “design” I better switch over to my MacBook Pro! Now I’m cooking!
Eclipse-ADK-Visual Editor
Hey there’s a graphical editor, right? What’s the problem? Ummm….yeah. Create an app and it opens by default. Should be easy – start dropping things onto the screen and…uh…WTF??? Ok – as swade says “keep calm and carry on…”. What I would say is there’s some good samples and help over at the developer.android.com site to check out. I’m going to look at Designing for Multiple Screens as a good starter. Before that you might want to look at the basics for general design here.

Create a new android project and deploy it to either an emulator or a device to make sure things are working right. Now is the chance to play around a bit. Drag out some form fields – do it slowly so you can see the lines show up. From my experience with other systems grid layouts are the way to go, so go ahead and switch over to a grid layout (it should have been deployed from teh start depending on your ADK version)from the general linear layout default. The best thing is to start experimenting with dropping in simple components, checking the generated XML, and then deploying the app.
If you want to change the “theme” of the app, the graphical defaults, don’t do it from the main activity file, you need to do this from the AndroidManifest.xml file at the top of the project. I set mine to Holo since this is the theme I have on my phone. Not sure yet how to make this dynamic based on the phone’s theme.

There’s a bunch of controls thrown out on the screen using RelativeLayout to organize them. Playing around with this it is pretty easy to layout the screen – be patient with the drag and drop and you’ll see guidelines for how the component will be lined up. If you connect a device and deploy the app you can see how portrait – landscape switching works. If you anchored widgets right, left, top, bottom, or center then they should hold those positions. Widgets set to stretch and fill should do that. That works pretty well and is pretty easy in the GUI designer. Perhaps some pieces of Window Builder Pro have made their way into the ADK plugin. Its pretty cool how that date field stays at the bottom right in both portrait or landscape mode.
More On Screens
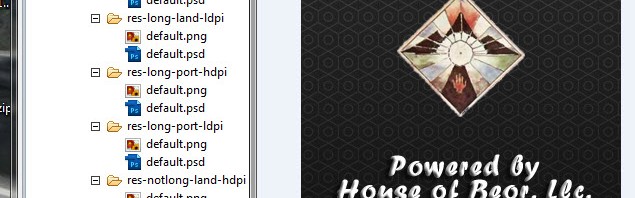
Screen size differences is a key area of complexity for Android developers. The Google training has a really good example and info here. The news reader example builds out a whole bunch of resolutions and introduces fragments (essentially aggregated “mini views” that can be assembled together to complete an activity screen. It will definitely take a bit of study to get all the new stuff in this example.
GRRRR: Right now I’m continuing to have problems with getting the sample projects to deploy in Eclipse. I’m going to have to dig in on this and fix it. I’ll get back on this post later today – I’m going for a run and then I’ll fix this trouble with the samples later today and update the post.
Back from my run – figured it out about 3 miles in while staring at the cool waters of the Atlantic and wondering why I was running instead of swimming…but that’s a different topic. the problem is the project.properties file – not consistent with the API level I’m using. The solution is to simply create a project with the same name as the sample. Go to the filesystem, delete the assets, res ,and src directories. Copy over those directories and any unique directories from he sample. Also copy over the manifest file. In Eclipse close and re-open the project. You should be good to go.
Screen sizes are a choice – You can just build to one screen, but this would leave users with tablets, phones with tablet like size, etc. feeling like you suck. Its better to try and handle this, especially if you happen to own a phone and a tablet then even you will think your own apps suck. 🙂
What to do – check out the sample mentioned above. Key in on the folder structure and the naming system. This is a really nice example since it covers all the big types of resolutions as of today (August 2012).It is definitely a lot of work scaling images and graphics in your app – which is a really good reason to not have a lot of graphics in your app.
A key aspect of the resolution support is the “stretching” of button graphics, backgrounds, and how images scale. Android’s “.9.png” files are new to me. They didn’t work right on my GPS app, so what’s the deal? The file is a regular png file, but with pixel marks that tell android how to stretch the graphic without distorting it. IMHO the png files that come with some of the google samples are not working .9.png files. The black guides are not black and are not 1 pixel wide. No workie!

If you are confused about these graphics then look at this excellent post by @radley. With that in hand I fixed up the defective graphics using the ADK 9-patch tool located in the ADK tools folder and now all is “workie”. While you are at that blog, here’s another good article and a reminder to check out the Google Android Design Resources site. Totally forgot about it – nice that you can download all the files.
Fragments
Now that I’ve figured out those button issues, fragments are a few feature in the android UI world. What are they? You can see a working example in the newsreader example mentioned above. I think of a Fragment as a section of user interface functionality that can be used in many activities.
- https://developer.android.com/guide/components/fragments.html
- https://android-developers.blogspot.com/2011/02/android-30-fragments-api.html
- https://developer.android.com/reference/android/app/Fragment.html
Fragments are especially useful for apps like the newsreader – so that you can chop up your layouts and make the app work in an optimized way on a broad set of devices.
That’s it for a few days – will be on the road for a couple of days – but will finish up on fragments and then get into finishing up on an android app and publishing it.